Showing posts with label DIY. Show all posts

Wednesday, 3 October 2012

Home Fire Safety Checklist


As a home owner, it can be easy to install a couple smoke detectors and throw a fire extinguisher in the kitchen and say your prepared. The hard honest truth is homeowner's need to take a a more comprehensive approach to fire safety and preparedness. By checking a few areas around your house with this fire safety checklist, you can ensure your home is a little safer, and sleep a little easier.

(Image: iStock)


Garage

Oily rags are in air-tight containers and away from heat sources
Trash is not stored in the garage
No pull-down stair access to garage attic space is linked to the main house
Door leading from the garage to the house is solid, has a threshold to block fire from traveling to the house
Door leading to the house has weather stripping to prevent carbon monoxide fumes from passing through
Garage is clear of junk that can facilitate fire
Gasoline is stored away from ignition sources like heat, sparks, and flames and in containers with approved labels.

Basement

Ensure areas around heat-generating equipment such as a furnace, oil burner or wood stove, are clear of combustible materials, debris and rags
Water heater burner-access doors are closed to prevent flame roll-out
Breaker panel has not been recalled or recommended for replacement
Breaker wires are not loose
Wire insulators show no signs of erosion or decay
Arc-fault circuit interrupters (AFCIs) have been added for protection from electrical wiring faults, particularly in older homes. WARNING: If you’re not an electrician, call one. Don’t try to fix this yourself

Oily rags are in air-tight containers and away from heat sources
Trash is not stored in the basement.

Laundry Room

There is no lint build-up inside the dryer, exhaust duct, or behind the dryer
Foil or plastic accordion-type ducting material has been replaced with rigid or semi-rigid metal duct.

First Floor
Working smoke detector
Cooking surfaces are clean
Towels, curtains, plastic utensils, and pot holders are stored away from hot surfaces
Cookies and other kid-friendly snacks are stored away from the stove
Kitchen has a working fire extinguisher
Light bulbs meet the recommended wattage of each fixture
Incandescent lights are not exposed, do not have a shade closer than 12 inches, and are at least 12 inches from combustibles
Any furniture meets recommendations for fire-resistant upholstery
Fireplace has a screen, surrounding area is clear of debris, and flue is clear of obstructions
Chimney is cleaned annually
Chimney has fire-stop of gypsum board or fire-code gypsum board at each floor penetration
Metal vent areas around chimney are blocked by sheet metal
No electric cords run under carpets or are pressed against a wall
Extension cords and outlets are not overloaded (powering too many devices).
Second Floor

All mattresses were made after 1973
Each bedroom and hallway has a working smoke detector especially if you sleep with your doors closed
Closet lights are not exposed
Light bulbs meet the recommended wattage of each fixture
Incandescent lights are not exposed, do not have a shade closer than 12 inches, and are at least 12 inches away from combustibles
No electric cords run under carpets or are pressed against a wall or bed
Extension cords and outlets are not overloaded
Portable heaters or other heat-producing appliances are three feet from beds and other flammable materials, such as curtains
All bedrooms have an escape ladder that all members of the family know how to use
Electric blankets are UL-approved, with cords in solid condition
The floor has a working fire extinguisher.

Attic

There are no gaps around the chimney
There is at least a three-inch gap between insulation and lighting fixtures.

Wednesday, 12 September 2012

How To Plumb a Single to Double Bathroom Vanity


Switching from a single to a double bathroom sink sounds complicated but we promise you can actually do it yourself. Once you done the fun part of choosing your new sinks and vanity, it is just a matter of tying together 2 sinks into a one main drain, easy right? We believe in you!

(Image Via Houzz)

Shut off the water with the shut-off valves under the sink. Begin removing the existing vanity by loosening the caulk between the wall and the vanity with a utility knife. Carefully remove the vanity countertop so as not to damage the wall. Remove all the screws or nails that are holding the old vanity to the wall. Dispose or recycle your old vanity.

Turn off all water going to the house with the main shut-off valve. For additional safety, turn off the shut-off valves on top of your water heater. Find the lowest faucet in the house and drain the water. Once that is complete, you can remove the old bathroom vanity shut-off valves and dispose of them.

Put in new double-outlet valves. Do this by slotting the supply pipe into the valve, making sure to pass the nut and compression washer over the pipe. Tighten that with a wrench. Repeat this for the hot and cold lines.

Turn the main water supply back on and make sure not to forget the water heater valves. Check the new plumbing for leaks. If you find one, tighten the compression nut a bit more.

Before you install the new vanity top, install the faucet and drain assembly to it. Attach the flexible supply line and tighten the compression nuts to the threaded posts that are on the faucet. Put the faucet through the pre-drilled holes in the vanity top, tighten the nut included to keep it in place. Put in the drain assembly by applying plumber’s putty under the rim of the drain trim. Push it down through the top of the drain hole. Next, tighten the nut from underneath the vanity until putty oozes out on all sides. This seals the drain to prevent leaks. Scrape off excess putty.

Screw in the tailpiece that comes from the drain assembly to the drain pipe and tighten it. Put in the lift lever and the stopper by lining up the lift lever through the hole in the rear of the tailpiece. Place it into the hole in the stopper.

Install the new vanity, securing it to the wall studs. Check to make sure the top is level and that all valves are clear of any drawers or other obstacles in the vanity. Apply a bead of silicone along the top of the vanity cabinet and set the sink on top.

Connect the supply lines to the hot and cold shut-off valves. Tighten the compression nuts with a wrench. Hook up connect the new drain assembly to the old drain pipe. Use a t-connector and a new p-trap. Tighten. 

Turn your shut-off valves back on. Keep your eyes peeled for leaks. Turn on the faucet and check for any leaks from the drain line. Fill the sink up with water and allow it to all drain so that you can check for leaks under pressure. Once you're sure everything is fine apply caulk to the sides and back of the vanity top to secure it to the wall. Allow it dry for 24 hours.

Friday, 10 August 2012

Repair & Replace Door Hardware


Whatever you’re reason for replacing hardware whether it be security, accessibility or for a new look, it’s important to use the right tools and the right hardware.

There are three hardware types for interior doors: privacy lock sets, passage latch sets, and dummy sets.

If you’re changing hardware for a bedroom or bathroom, opt for a privacy lockset with a simple push lock. If your door is a larger closet or a main room of the house like a living room or dining room opt for a passage latch set. If your door is a smaller closet or other room where the door does not latch, go for a dummy set.

(Image: Houzz)
  1. How To:
  1. Before you purchase your new door handle, measure your door. The standard door size is 1 3/8-inch thick, and modern door handles are designed to fit this size. Check your door’s thickness before you select your new hardware.
  2. Next, decide what type of door handle you’d like: a knob-type handle or a lever-type handle. Knob-type handles turn with a round knob, while lever-type handles look like a sideways “L.” You push down on the lever to open the door.

    When you purchase your hardware set, make sure your package contains: interior and exterior sides of the handle set, the latch, a strike plate that goes on the jamb of the door, installation screws and key (if you’re using a privacy lockset). These items will be listed on the package.
    1. Remove your old door hardware. To do this, look for two screws on the interior side of the handle (near the door). Take out the screws in the door edge and pull off the knob slowly.

       Remove the strike plate on the doorjamb. The strike plate is the metal plate affixed to a doorjamb with a hole or holes for the bolt of the door. Your doorjamb is the vertical part of the frame where the door is secured. Insert your latches into the faceplate holes and secure them with two screws.

      Now it's time to install the new hardware! Start by installing the faceplate. Make sure the plate fits flush with the door. If it doesn’t, use a hammer to lightly tap the faceplate until it sits flush.

      Next, insert the side of the handle set that fits through the middle of the latch. Then fit the exterior half of the doorknob over the interior half (it will fit snugly). and
  3. Secure the two halves together with the two screws that came with the knob. Tip: Install the first screw loosely and then insert the second screw. That way, you’ll be sure they line up properly. Once they’re both in, then you can tighten the screws with a screwdriver. Lastly, install the strike plate in the doorjamb with two screws for wood.

Wednesday, 8 August 2012

Batten Down the Hatches 
Repairing a Storm Door 


Does it take the force of 1,000 winds to close your storm door? If your door doesn't close or takes a firm tug to close, chances are it's grating against the frame and your nerves. When the metal frame on the hinge side of the door comes loose, or the moulding loosens, the door begins to sag and scrape against the opposite side of the frame.


(Image: Houzz)

Before you go running for your tools asses and determine where the issue is. Partly open the door and push the door up and down, keeping an eye on the hinge side of the frame. 

Re-Nail the Door Moulding

If the moulding moves, secure it with extra nails. Start by adding a couple of nails near the top of the wood trim. Then add nails further down if necessary. Sink the nailheads slightly with a nail set, cover the heads with acrylic caulk and touch up the moulding with paint. Position the door by wedging a shim between the door and the frame. Pre-drill and drive 10d galvanized finish nails to firmly fasten the moulding.

Add Additional Screws

If your wood trim is good it's more than likely your metal framing loosening. To fix the metal frame add a few No. 8 x 1-in. pan head screws. Stick a shim between the door and the frame, tighten the existing screws and drill new screw holes through the frame. Press lightly as you drill the metal; you don’t want to drill into the wood molding with the 3/16-in. bit. Then drill a 3/32-in. pilot hole into the wood and add screws. Usually two or three screws added near the top of the frame will work. For a neater look, spray-paint the screw heads first.

Wednesday, 11 July 2012

Green Your Clean
5 Eco-Friendly Homemade Cleaning Products


There are many inexpensive, easy-to-use natural alternatives which can safely replace your commercial household cleaning products. Here is a list of common, environmentally safe products which can be used alone or in combination for a wealth of household cleaning duties. We've also included some recipes for some greener cleaners to get you started.


  • Baking Soda - cleans, deodorizes, softens water, scours.
  • Soap - unscented soap in liquid form, flakes, powders or bars is biodegradable and will clean just about anything. Avoid using soaps which contain petroleum distillates.
  • Lemon - one of the strongest food-acids, effective against most household bacteria.
  • Borax - (sodium borate) cleans, deodorizes, disinfects, softens water, cleans wallpaper, painted walls and floors.
  • White Vinegar - cuts grease, removes mildew, odors, some stains and wax build-up.
  • Washing Soda - or SAL Soda is sodium carbonate decahydrate, a mineral. Washing soda cuts grease, removes stains, softens water, cleans wall, tiles, sinks and tubs. Use with care, as washing soda can irritate mucous membranes. Do not use on aluminum.
  • Isopropyl Alcohol - is an excellent disinfectant.
  • Cornstarch - can be used to clean windows, polish furniture, shampoo carpets and rugs.


Laundry Soap


Ingredients
Borax
Baking Soda
Pure Soap or Castile Soap
Essential Oil

Directions
Grate your bar of soap to make a ½ cup. Combine soap with 4 cups of baking soda and 10 cups of borax in a large bowl, whisk together until thoroughly combined. Add three tablespoons of essential oil and whisk again. Fill your jar with your new laundry detergent.

Use 2 tbsp for each load of laundry. Washes approximately 80 loads of laundry.


All-Purpose Cleaner


Ingredients
Citrus Peels, Herbs or Essential Oils

5% White Vinegar
Water
 

Directions
If you are using citrus peels or herbs to make your cleaner scented, lightly pack a glass jar with your selected ingredient and fill remaining space with vinegar. Be sure not to fill it all the way to the brim, you want a little head space, at least a half inch. Let your vinegar mixture sit in a sunny spot for a week. After a week, strain your mixture and pour into a spray bottle and add equal part water.

Alternatively, you can pour your vinegar into your spray bottle, add a couple drops of essential oils and there you have it! Oils such as Tea Tree, Lavender, Pine and Lemon are the most common and have additional antibacterial properties.


Window Cleaner


Ingredients
Rubbing Alcohol
Vinegar
Corn Starch
Water

Directions
Combine 1/4 rubbing alcohol, 1/4 vinegar and 1 tbsp of corn starch with 2 cups of water in a spray bottle. Shake well before each use.
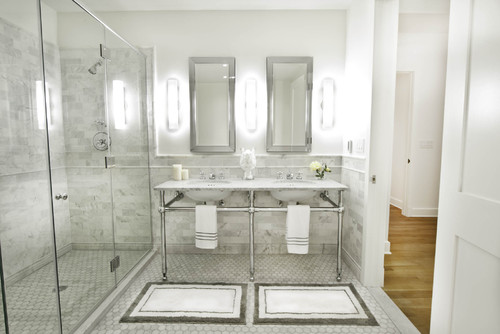

Shower Cleaner


Ingredients
Dish Soap
Vinegar

Directions
Mix equal parts dish soap and vinegar. Spray down the shower and let sit for 2 hours, wipe down shower with a cloth and hot water.


Pet Odor Eliminator


Ingredients
Mouthwash

Water
Newspaper

Directions
In an empty spray bottle combine 2 parts water to 1 part mouth wash. Spray the mixture onto whatever upholstery is soiled. Lay newspaper over the sprayed area and let dry. The newspaper should absorb the smell completely. If not, repeat the process.

Wednesday, 13 June 2012

How To Maintain a Fence


A fence is more than just a marker for a property line.  A fence can keep people and pets in or out, provide security and increase value and curb appeal. No matter what type of fencing you have, maintaining it is always important.

Wood Fence


Wood fences can be the most difficult to maintain but for many it is worth the added charm. Inspect your fence for any boards that are in need of repair. Repair could include repainting or replacing an entire panel. If your fence is stained you will need to restain every few years. Climate is a major factor for how often you will need to restain but the general rule is if water no longer beads of your fence when wet, it’s time.


Vinyl Fence


Vinyl fences are one of the easiest to maintain a quick spray with the hose and a scrub with a stiff bristle brush will generally clean off any grime. For tougher stains, a stiff bristled brush combined with a mix of dish soap and vinegar should easily remove any tough stains. Never use caustic chemicals such as bleach or ammonia to clean vinyl products. These chemicals can weaken vinyl’s bonds and combined with sunlight will cause it to become brittle and weak.

Chain Link, Steel, Aluminum and Other Metal Fences


Generally for most metal and chain link fence a simple wash with a garden hose will do the trick in removing most dirt and debris.  A stiff bristled brush and a bucket of warm soapy water will easily remove any tougher, stuck on dirt. 


If rust is visible, apply a rust-inhibiting agent followed by primer then paint to match the existing colour. Heavily rusted sections, poles and hardware will need to be replaced accordingly. 

Wednesday, 6 June 2012

It's Raining, it's pouring, a day without DIYing is boring!
Four rainy day DIY projects when you're stuck inside.


A rainy day or in some cases even a rainy week can really throw a wrench into your DIY plans. Don't let mother nature make your to-do list even longer, here's four projects you can do no matter what the weather forecast. 

Chalkboard Weekly Dinner Menu

This project is great for all those weekly meal planners and it stops the question "What's for dinner?" Now everyone knows what they're having. Step 1 - Cut and sand a 1.5' x 3' piece of material, it can be wood, metal or plastic, depending on your preference.

Step 2 - Spray board with 2 to 3 coats of primer and allow to dry. Apply 2 to 3 coats of chalkboard paint with a foam roller, allowing ample drying time between coats. Tip: Cover your tray and paint roller in plastic wrap in between coat so you only have to wash them once.

Step 3 - Cut out and apply stencils for your menu heading and days of the week. Paint on stencils, again allowing enough time between each coat for drying.

Step 4 - Start planning your weekly menu and get cooking!


Striped Accent Wall

Add a bit of excitement with a brightly coloured accent wall. You can even kick it up a notch with stripes or the recent even more recent trend, chevron stripes.Step 1 - Measure out your lines using a ruler or measuring tape. Use a measuring tape and straight edge to ensure your lines are even all the way up. Place painter's tape over your markings.

Step 2 - Paint 2 to 3 coats for your first set of lines. Allow each coat to dry properly.

Step 3 - Paint 2 to 3 coats for your second set of lines if you are doing a multiple coloured wall. Allow paint to dry between each coat.

Step 4 - Sit back and enjoy!


Rope Necklace

Simple hardware make this statement accessory a snap to put together.Step 1 - Use scissors to cut nine 64" pieces of nylon rope. Loop the rope through the end of the brass snap and wrap with gaffer tape once the end are looped through. Slide your coupling over the tape.

Step 2 - Clip your snap onto a secure surface, like a drawer pull. Divide the cords into three groups of six and braid the cords as you would hair.

Step 3 - When you reach 2-inchs from the cords end tightly wrap an elastic band around the base of the braid. Separate a single cord end and knot it to the end of a 4-1/2 inch gold chain.

Step 4 - Cut the remaining rope ends, wrap with gaffer tape and slide your remaining coupling over the tape.


Pendant Lights

Pendant lights aren't just for diners, they look great and can easily change the look and style of any room.Step 1- With your breaker shut off the power either in the necessary room. Remove the old light fixture.

Step 2- Attach the new mounting bracket to the junction box. In most cases, the old mounting bracket will use mounting screws that screw in from the bottom. Some new mounting brackets have open bolts on the bottom that are capped with a cap nut.

Step 3 - Following the manufacturer’s instructions attach the wires to the new fixture. Usually white to white, black to black and ground to ground.

Step 4 - Secure the connections with wire nuts, then attach the bare ground wire to the green ground screw on the mounting bracket. On some fixtures, the neutral wire may be a black wire with a white stripe. Slide the new fixture over the bolts in the mounting bracket, then attach the mounting cap nuts. Turn the power back on.

Step 5 - Invite your friends and family over to tell you how stylish your new light is!

Friday, 1 June 2012

Build a Simple Raised Vegetable Garden Box


Raised garden beds are one of the easiest ways to start a vegetable garden. This 7ft x 5ft garden box is made from cedar which is naturally rot resistant and doesn't require staining, sealing or painting. However you can if you would like to match your homes decor.

When you plant the right foods the amount you spent on the materials can be quickly offset by savings at the grocery store, not to mention fresh fruits and vegetables from straight from the garden just taste that much better.

Difficulty       Time            Cost
Easy               20 Minutes       About $40

Shopping List
4 8ft cedar fence boards4 6ft cedar fence boards
1” screws
2” screws

Tools
Safety Glasses
Pencil
Hearing Protection
Drill
Circular Saw or Mitre Saw
Tape Measure

Cut List
4 1x6 cedar fence boards at 60” (end panels)
4 1x8 cedar fence boards at 84” (side panels)
8 12” from cut fence boards


Step 1: Prepare Your Location

Select a flat, level and sunny location where you would like to place your garden box. Most vegetables like between 6 to 8 hours of sunlight so it’s best to pick a location that receives a lot of sun. Measure out the area of your garden box and lay down weed fabric. Secure weed fabric in place.


Step 2: Cut Panels

Cut 1-foot off the end of each fence board so that you have four 7-foot boards, four 5-foot boards and eight 1-foot pieces.


Step 3: Build Side and End Panels

Make sure that you attach the 1-foot sections to the rough side of your fence boards as this will be the inside of your box.


Flip your boards over and using 1” screws attach with two 1-foot pieces at either end of your 7-foot boards, placed about 1-foot from the edge of the boards. 


Repeat this step with the remaining 6 boards, attaching in pairs.


Step 4: Lay Out Your Box

Now that your sides are built, lay each one in place for the garden box. Ensure that you have a slight over lap of weed fabric. 


Step 5: Attach Panels

Butt together the ends of each side up and attach using 2” screws. Add screws to the top, middle and bottom of each end.


Step 6: Finish the Box


Lightly sand any rough edges and corners to smooth away splinters. Fill with soil, either your own mixture or store bought garden soil depending on your preference.